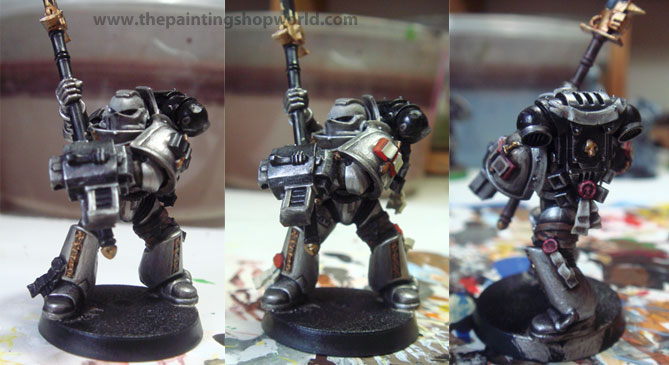
Got my Grey Knight Purifier painted earlier ago, and now working on the rest of the squad. Progress have been slow due to some commissioned works I am working on. Anyway, I will share with everyone how I got my Grey Knights painted in my usual “I show you how to paint”… Here goes…
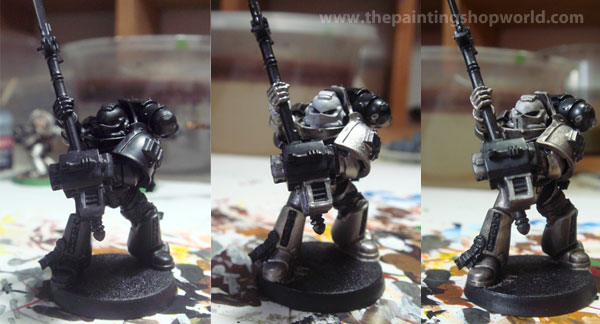
1. Started with a basecoat of Citadel Chaos Black. My Grey Knights is based on a colour theme of titanium colour. Once the basecoat is dried, base colour the Grey Knights in a mixture of Citadel Chainmail and Shinning Gold. The bolter and other metal parts are base coloured with Citadel Bolt gunmetal. For the helmet, I mixed Citadel Skull White with Chainmail to achieve a sort of shining metal white colour feel. Once all the base colour are done, Citadel Badab Black is washed onto the whole miniature.
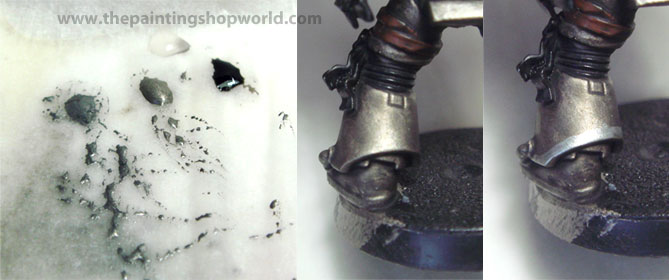
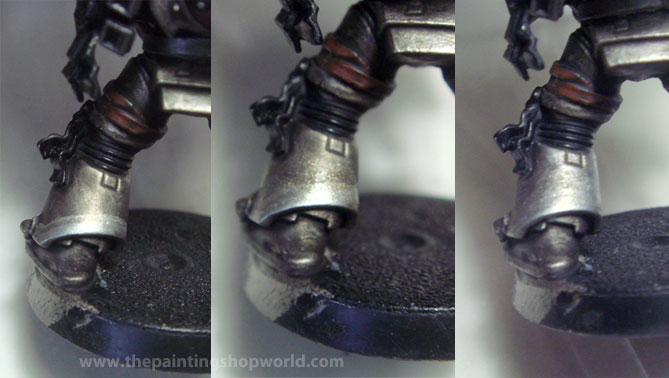
2. Next is the highlighting of the titanium colour armour. I will explain the method to the highlighting which I applied to all the armour in the Grey Knights. In my wet palette, I got 3 paints, Citadel Mithril Silver, Titanium mix and Badab wash. Start by painting Citadel Mithril Silver along the edge of the Grey Knights’ leg.
3. While the Citadel Mithril Silver highlight at the edge is still wet, take the Titanium colour mix and blend with the Mithril Silver at the edge. The key thing to remember is the Mithril Silver and the Titanium mix must be just wet enough to blend. After the blend is done and the paint still wet, take Badab Black and blend the titanium mix to the base colour of the armour. Take a little practice to get the wetness and consistency right to blend. I use this method & colour scheme for the highlights on the Grey Knights.
4. Once the main armour highlighting is done, next is to finish off the small details. All the skull and inscription are coloured with Citadel Shinning Gold and wash with Gryphonne Sepia. The purity seals are coloured with Citadel Bleached Bone, washed with Devian Mud, then highlighted with Bleached Bone and Skull White. The Storm Bolter and power armour backpack is finished off with a light dry brush of Citadel Mithril SIlver.
5. Next for the Nemesis Force Halberd. The Halberd is coloured with Citadel Bolt gunmetal, and the blade portion coloured with Mithril Silver. Then it is wash with a diluted wash of Midnight Blue. The blade portion is then painted with a mix of Citadel Mithril Silver, Skull White and a tiny bit of Midnight Blue. The rounded corner of the blade is then blended with the mix of Citadel Mithril Silver and Skull White.
6. For the lightning stroke on the Halberd, I started with a diluted mix of Citadel Skull White and painted a random broad lightning stroke effect. Next, taking a heavy Skull White, painting thin strokes over the lightning strokes. This will give a blend effect from the diluted Skull White blending to the heavy SKull White. The edges that holds the Halberd, I did a light dry brush on the edges with a mix of Citadel Skull White and tiny Midnight Blue. The edges are then edges out with Skull White. And now, you can feel the power of the Nemesis Force Halberd!
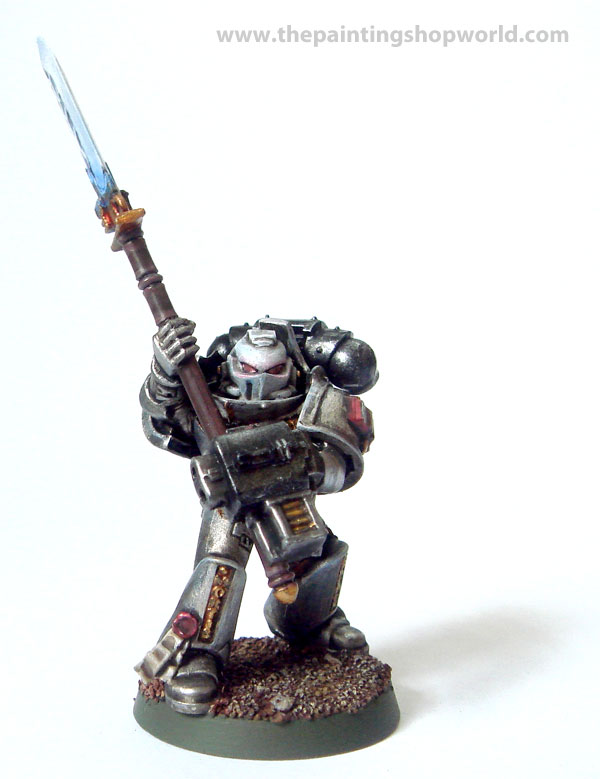
Finished off the rest of the details and finally based the Grey Knights, and my Grey Knights Purifier is ready to battle. FOR THE EMPEROR!
Share this:
- Click to print (Opens in new window)
- Click to email a link to a friend (Opens in new window)
- Click to share on Tumblr (Opens in new window)
- Click to share on Facebook (Opens in new window)
- Click to share on Reddit (Opens in new window)
- Click to share on Twitter (Opens in new window)
- Click to share on Pinterest (Opens in new window)


2 Responses
I have about 500 points of Grey Knights to paint after my Dark Angels and I wanted to ask this question:
How do you layer the paint and not have it get “gloppy” and thick? For example you did Chaos black then 2 other layers.. when I do the same it looks too think and usually small details get blocked out.
I should you should dilute chaos black with abit of water first, before painting. Too thick paint, will block out the details. Cheers!