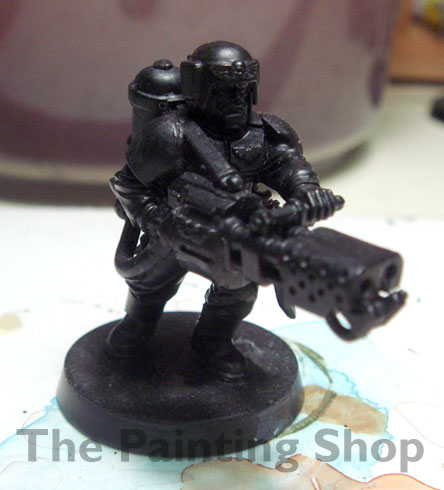
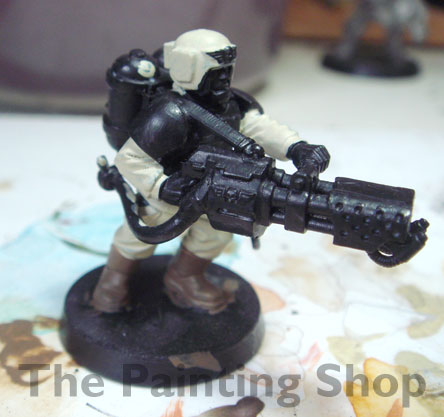
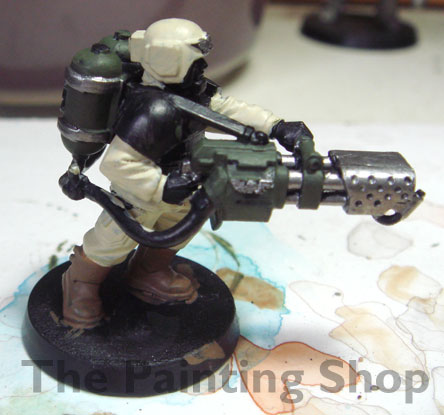
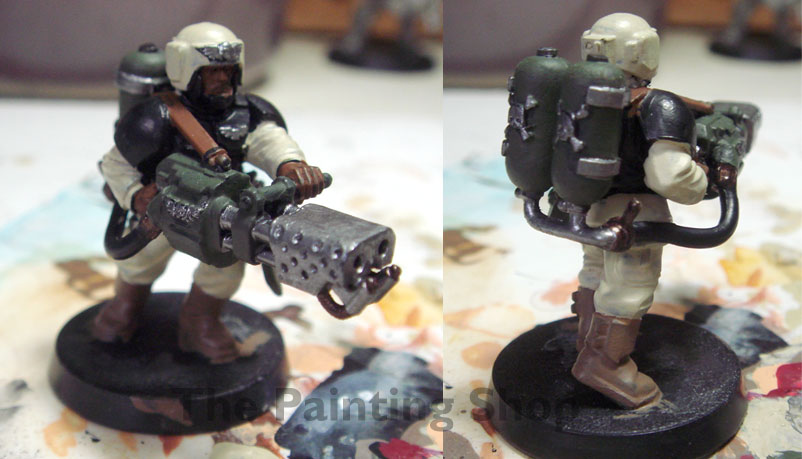
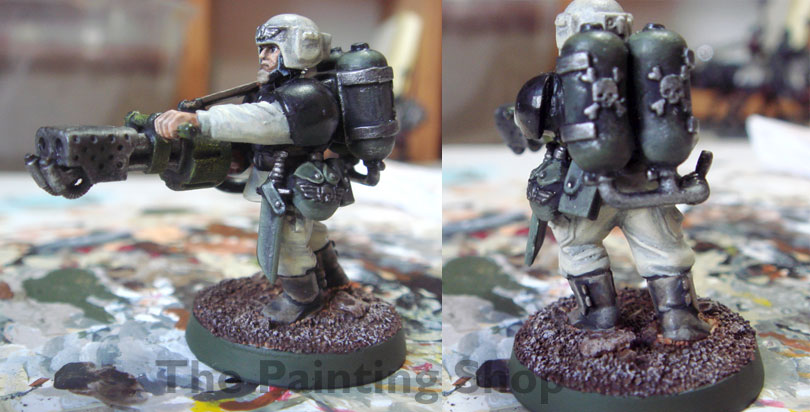
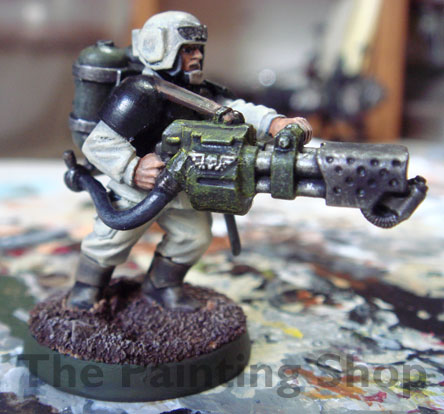
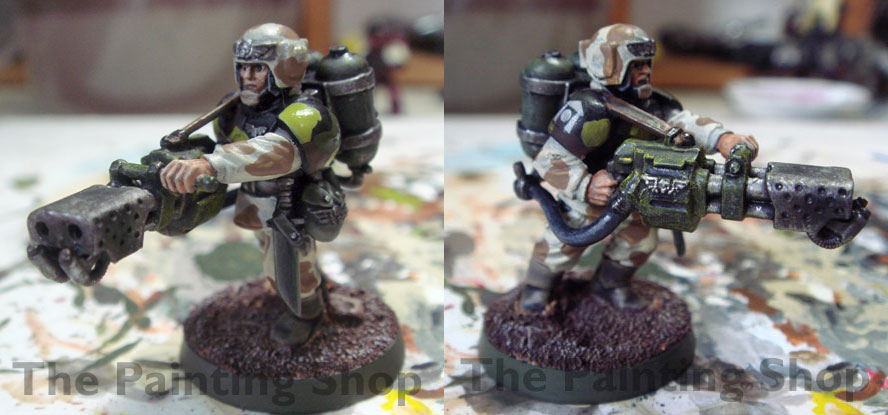
I am still working on my 40k Imperial Guards HQ command squad. Thought I show a step by step on how the Imperial Guards Heavy Flamer Guardman was painted. As there is only Imperial Guard flamer available on the 40k Imperial Guard Cadian Shock Troops box set, if one need a heavy flamer, one would have to perform an imperial guard conversion to convert a heavy flamer. You can see my earlier post on how it was converted.
Here’s how I got my 40k Imperial Guard Heavy Flamer painted…
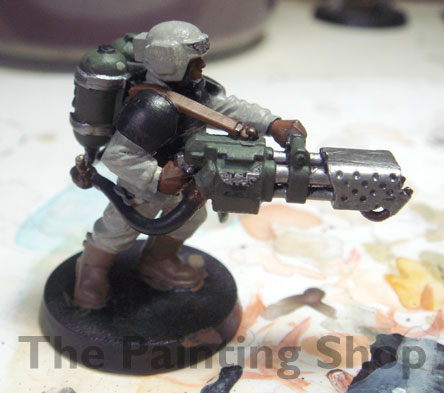
1. Base coat the Imperial Guard Miniature with Citadel Chaos Black.
2. Paint the boots with Citadel Graveyard Earth and the uniform & helmet with Citadel Bleached Bone.
3. Paint the flamer head and other details with Citadel Bolt gun metal. The gas tank and the flamer gun body is painted with Citadel Catachan Green.
4. Paint the flamer strap, hands and face with Citadel Beastial Brown. The flamer switch and connector are painted with Citadel Tin Bitz
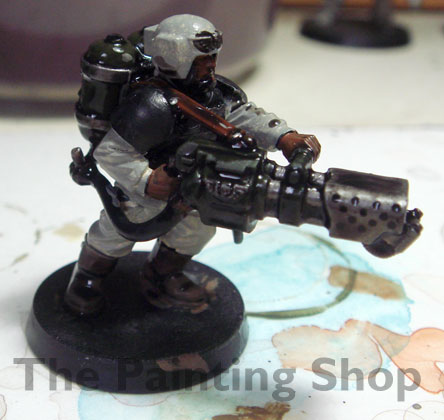
5. Mix Citadel Bleached Bone with a little Citadel Chaos Black to form a grey mixture for the uniform.
6. Wash the boots, gas tank, waist pouch, knife and flamer with Citadel Badab Black.
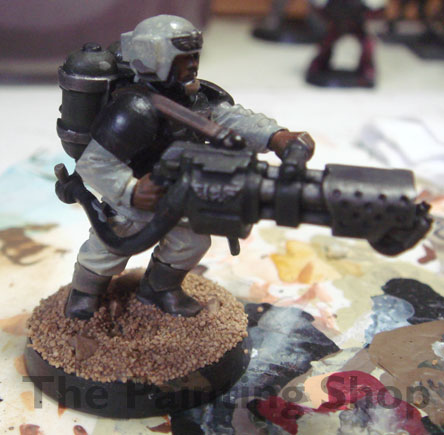
7. After the wash has dried, base the miniature with sand (was in mood to base, usually I would base when I am done with everything.)
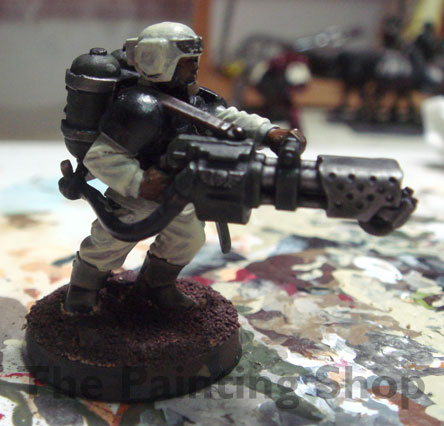
8. When the sand base is dried, paint the sand with Citadel Scorched Brown.
Blend the uniform & helmet with a mix of Citadel Bleached Bone and a little Chaos Black, then highlight the high points on the uniform and helmet with Citadel Bleached Bone.
9. The gas tank, pouch and bottle was blended and highlighted with a mix of Citadel Catachan Green and white.
The skin and face is layered and blend with a mix of Citadel Beastial Brown and Citadel Elf Flash, followed by highlights with Citadel Elf Flesh.
The bolt gun metal parts are dry brushed with Citadel Mithril Silver. The Head of the flamer was then dry brushed with Citadel Chaos Black.
The boots was highlighted with a mix of Citadel Graveyard Earth and Skull white.
The Base was dried brush with Citadel Beastial Brown, followed by Snakebite Leather and finally Skull White.
(Was so engrossed in the highlighting and blending that I forgot to snap pictures of it until I realised I was done.)
10. The flamer gun body is dried brush with Sunburst Yellow.
11. Last but not least, painted the camo pattern with Citadel Graveyard Earth on the uniform and helmet.
The camo pattern on the armour was painted with Scorched Brown, Catachan Green and camo green.
Final touch, added the decal on the shoulder armour. The decal was then wash with a light wash of Badab Black to reduce the shinness on the decal.
Pardon me for the last few steps as I was so into finishing it that I forgot to snap pictures of it… haha. Hope this simple step by step gives everyone a rough feel to how I did my 40k Imperial Guards. Now, back to the command squad…
FOR THE EMPEROR!
Share this:
- Click to print (Opens in new window)
- Click to email a link to a friend (Opens in new window)
- Click to share on Tumblr (Opens in new window)
- Click to share on Facebook (Opens in new window)
- Click to share on Reddit (Opens in new window)
- Click to share on Twitter (Opens in new window)
- Click to share on Pinterest (Opens in new window)
