I am gonna to show you how I created the stain glass for my Kingdom Death Great Game Hunter backdrop. As with my miniatures stories goes, I pictured my Kingdom Death Great Game Hunter to be standing by a stain glass window in some part of her castle, getting ready for the great hunt. My initial idea was to paint one, but I thought it would be nice if its a real glass effect. After much research and testing, here’s how I created the stain glass.
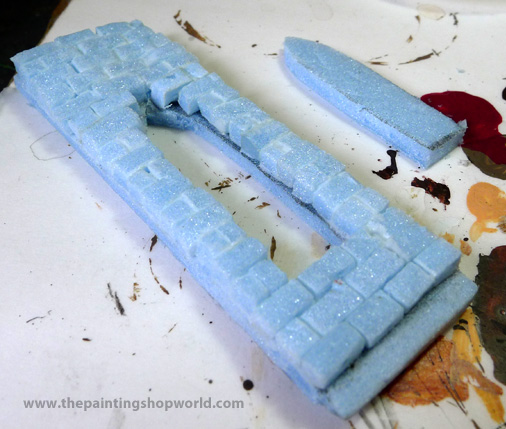
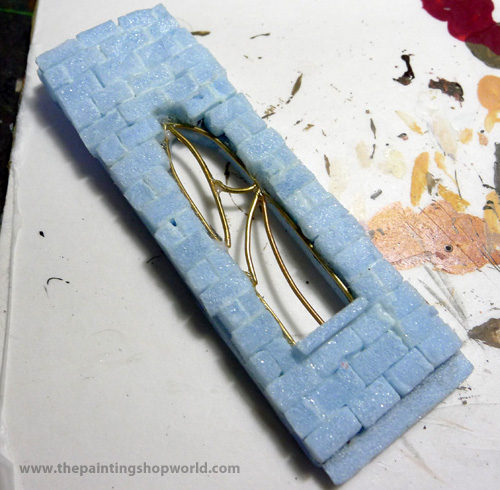
I started of building the wall segment for the backdrop with blue foam. Cut some blue foam in small brick size and build up as a wall on a blue foam backing. After the wall is build up, the window slot is cut open and edges are cleaned up as shown below.
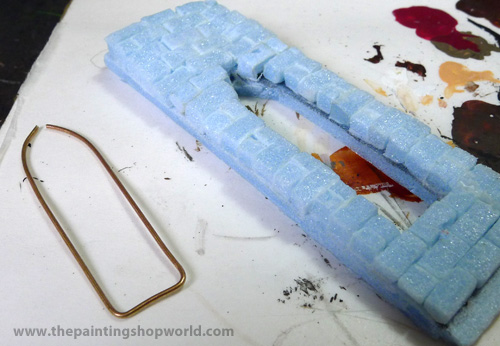
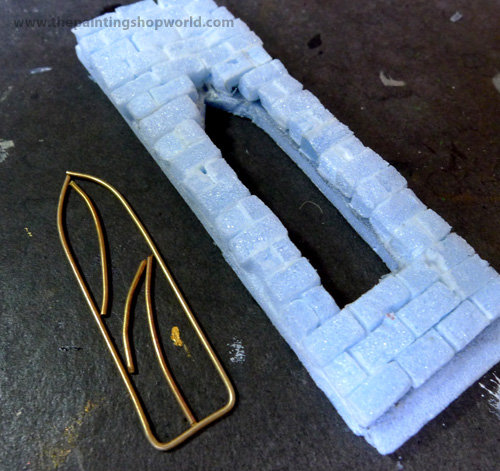
Next I use a thin 1 mm brass rod and bend it into an outline of the window shape. Cut out small short pieces of brass wire to roughly form the shape pattern of the window.
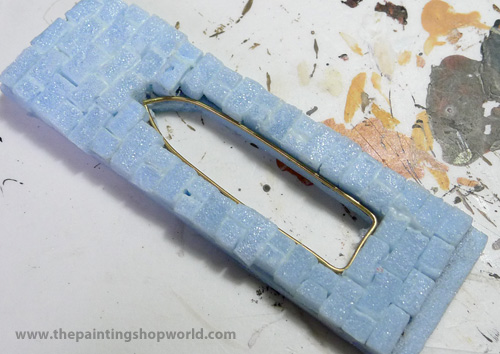
Now for the gluing part. I fitted the wire outline into the foam window cutout. I used a CA glue accelerator along with CA glue. First I apply some CA glue accelerator around the brass wire and the foam. Then after which, CA glue is quickly applied around the brass wire and foam. With the accelerator taking effect, the CA glue is immediately crystallized and dried.
For the window frame pattern, I used the same technique as mentioned above. Apply the accelerator on the joining brass wire, using a plier to hold the wire in position to the wire frame, quickly drip CA glue onto the join section. The CA glue will crystallized immediately forming a welded look-alike joint. Continue until the pattern is formed as shown.
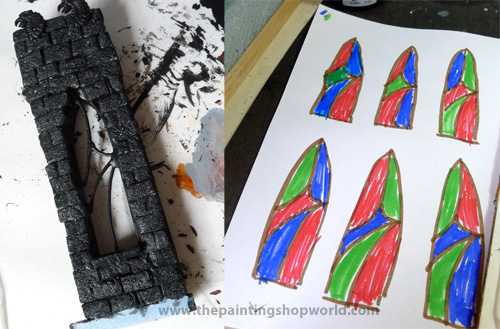
Once everything is dried, the wall is base coated black. While waiting for the black coat to dry, I sketched and decide on the stain glass pattern colours.
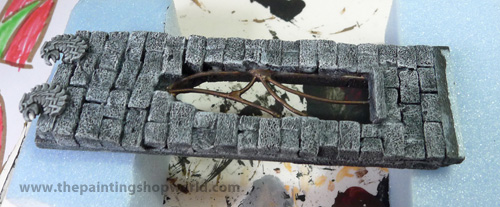
The wall is then painted with a mix of Citadel Chaos Black & Skull White mix forming a grey colour. After then it is washed with Bedab Black. Once dried, it is dry brush with Skull White. Finally the brass wire is painted with Tin Bitz and washed with Bedab Black.
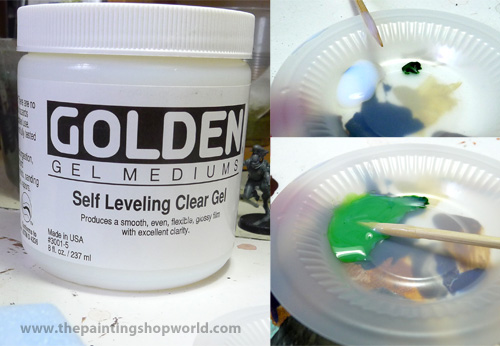
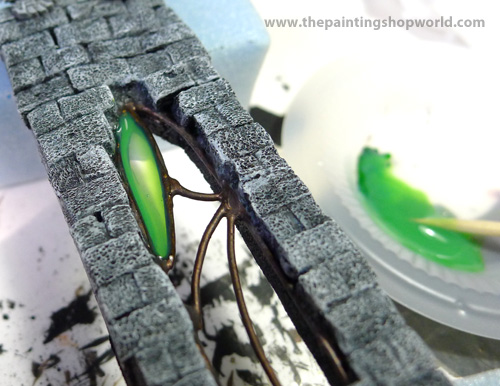
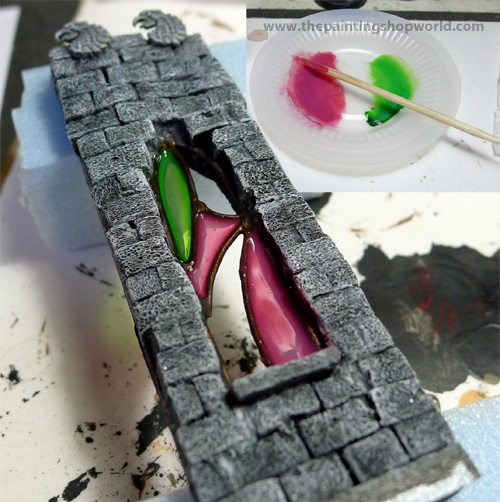
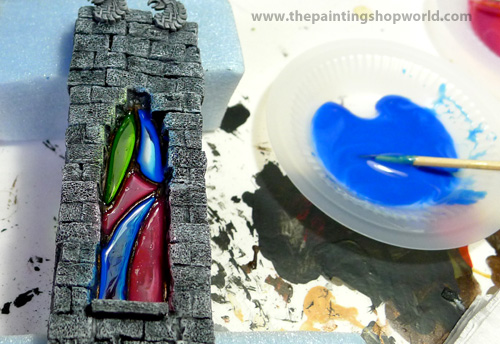
To create the stain glass, I used Golden Self Leveling Gel. Take a small amount of gel and mix it with Citadel Dark Angel Green . Mix the gel with the colour slowly to prevent air bubbles from forming. Using a tooth pick, drip the coloured gel around the section of the wire frame. With enough gel at the wire frame, try to pull the gel across the wire frame to form a closed gel. If there are too much gel on the wire frame, you can use a old brush and brush away the extras. Leave the window frame in a lying down position when drying. Wait for the gel to dry and repeat with the blue and red gel.
When the gel is dried, if holes are formed on the gel, you can apply a thin layer of the colour gel over the holes to patch it up.
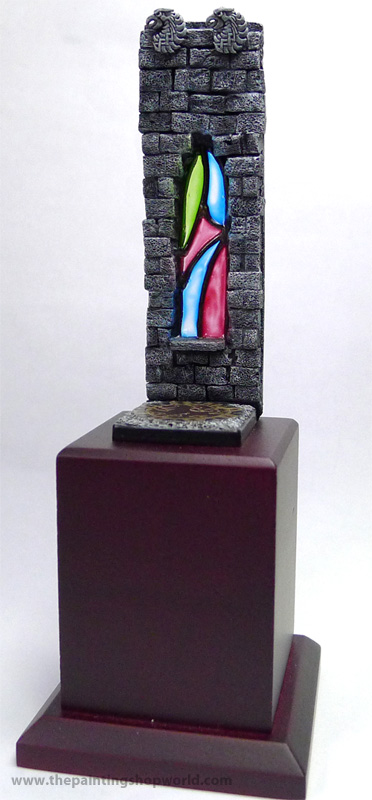
Now, when all the gels are dried, it will formed a clear shining coloured glass effect. Overall, building this stain glass effect has been a really enjoyable and fun experience. If you are creating diorama with windows and glass, should try it. I just had an idea, maybe some of my Cities of Death can have glass effects… Hmm… back to more painting… Cheers!
Share this:
- Click to print (Opens in new window)
- Click to email a link to a friend (Opens in new window)
- Click to share on Tumblr (Opens in new window)
- Click to share on Facebook (Opens in new window)
- Click to share on Reddit (Opens in new window)
- Click to share on Twitter (Opens in new window)
- Click to share on Pinterest (Opens in new window)

4 Responses
Excellent !!!
CS
Thanks…
Whoa, that’s actually… really neat. I am definitely going to have to use this in a project, as I’ve already got some wire sitting around.
Thanks… do share with us your projects when done!